Pretrained models such as StarDist and Cellpose work well when your images resemble the data they were trained on. When your images look different, or you want to segment specific objects that these generalist models aren’t designed for, training your own model can give better results.
In this tutorial we illustrate this by training a nuclei segmentation model on the actin (phalloidin) channel instead of the DNA (Hoechst) channel. The motivation is that if such a model works well, the DNA stain could potentially be left out from future experiments, freeing up that channel for another marker.
There are different workflows for generating the training labels. Rather than manually annotating nuclei by hand, we use StarDist to segment nuclei on the DAPI channel and use these segmentations as ground truth labels paired with the corresponding phalloidin images.
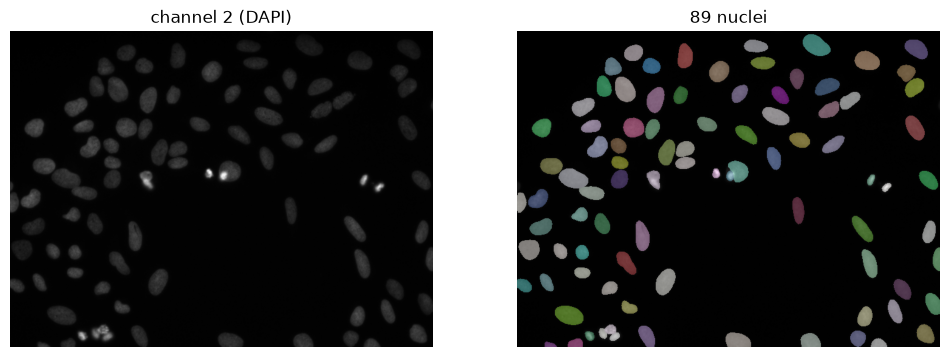
StarDist on the DAPI channel gives the labels.
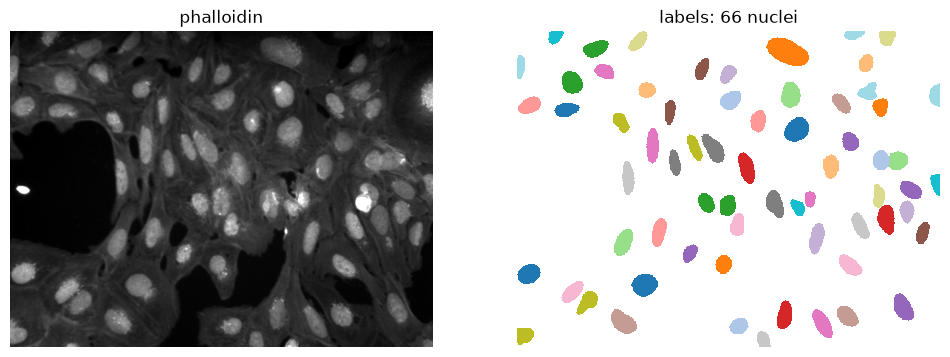
The training pair: the phalloidin channel as input, the StarDist nuclei as target.
Learning goals
After this session you can:
Find a faster way to labels than drawing every object by hand, for example a pretrained model on an easier channel followed by correction in napari, and explain why the model can never be better than its labels.
Split data into training, validation and test sets, and recognise when a random split leaks information (frames of a time lapse, slices of one sample, fields of one patient).
Evaluate an instance segmentation with IoU, precision, recall and F1, and choose the IoU threshold that fits your question.
Explain how the training target (foreground, or foreground plus contour) decides whether touching objects get separated.
If you continue at home:
Compare fine-tuning a pretrained model (Cellpose-SAM) with training from scratch.
Train a model that predicts an image instead of labels (virtual staining).
Notebooks
00_data_collection_stardist.ipynb— collect images from the Image Data Resource as remote OME-Zarr, generate nuclei labels with StarDist on the DAPI channel, check and correct them in napari, and write them totraining_data/. To save you time, we provide the training data directly (see below), so you don’t need to run this notebook yourself.01_training_instance_segmentation.ipynb— the main notebook for this session. Check the labels, splittraining_data/into training, validation and test sets, train a first model on the foreground only, read BiaPy’s own curves and scores, then work out why touching nuclei end up merged, add the contour channel and compare the two runs.02_training_image_to_image.ipynb— train a model on the same input that predicts the DAPI intensity image itself (virtual staining) instead of nuclei labels.03_training_cellpose.ipynb— an alternative approach which fine-tunes the pretrained Cellpose-SAM model, and compares before and after.
Ideally, the training notebooks are run on a computer with a GPU, reducing training time to a few minutes and allowing you to explore the parameters relevant to training an optimal model.
Training data
Download data from: https://training_data/images/ (phalloidin), training_data/labels/ (nuclei
labels) and training_data/nuclei/ (DAPI, used in 02_training_image_to_image.ipynb).
The images come from IDR screen 1952 (idr0036), a Cell Painting experiment in U2OS cells, published under CC0: Gustafsdottir et al. (2013) Multiplex cytological profiling assay to measure diverse cellular states. PLoS One. Gustafsdottir et al. (2013)
Building the dataset
In 01_training_instance_segmentation.ipynb you split the data yourself, by hand or with
your own script, into this structure:
dataset/
├── train/
│   ├── images/
│   └── labels/
├── val/
│   ├── images/
│   └── labels/
└── test/
    ├── images/
    └── labels/
Running on SURF Research Cloud
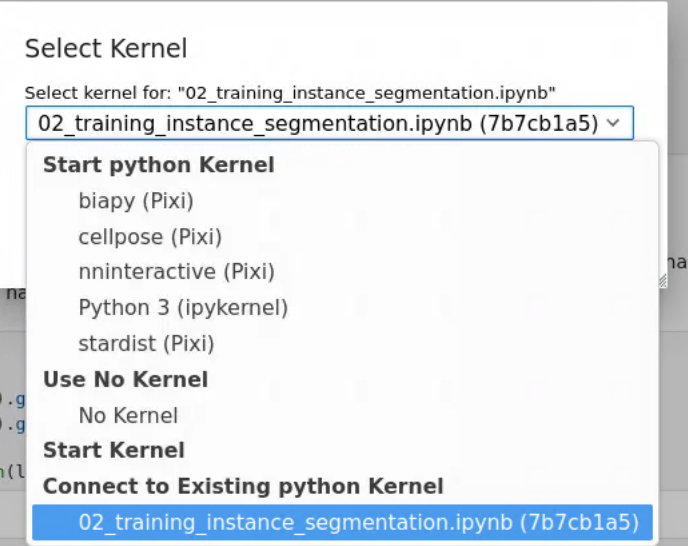
All environments are already installed on the workspaces. Clone this repository inside Jupyter lab (see Using SURF Research Cloud), open the notebook and pick the matching kernel from the launcher (right top above notebook).
Environments
To run the notebook locally it is best to use separate environments.
All include ipykernel so JupyterLab can use them.
00_data_collection_stardist.ipynb
conda create -n nlbi26-day3-prep -c conda-forge python=3.12 ipykernel
conda activate nlbi26-day3-prep
pip install "tensorflow>=2.16,<2.22" stardist requests zarr "dask[array]" ome-zarr \
    tifffile scikit-image matplotlib "napari[all]"
On Intel Macs, TensorFlow has no macOS x86 wheels after 2.16.2, so use
pip install "tensorflow==2.16.2" there.
01_training_instance_segmentation.ipynb and 02_training_image_to_image.ipynb
Both use BiaPy:
conda create -n nlbi26-day3-biapy -c conda-forge python=3.13 biapy napari pyqt ipykernel
conda activate nlbi26-day3-biapy
You can check if the GPU is detected:
python -c 'import torch; print(torch.__version__)'
>>> 2.12.1
python -c 'import torch; print(torch.cuda.is_available())'
>>> True03_training_cellpose.ipynb
Cellpose 4 (Cellpose-SAM) requires a specific version of PyTorch, so it needs its own environment too:
conda create -n nlbi26-day3-cellpose -c conda-forge python=3.12 ipykernel
conda activate nlbi26-day3-cellpose
pip install "cellpose>=4" pandas matplotlib scikit-image
It reads the dataset/ folder you build in 01_training_instance_segmentation.ipynb
(section 2), or with organize_data.py. Training CellPose 4 on a CPU is not realistic so you really need to do this on a system with a GPU.
- Gustafsdottir, S. M., Ljosa, V., Sokolnicki, K. L., Anthony Wilson, J., Walpita, D., Kemp, M. M., Petri Seiler, K., Carrel, H. A., Golub, T. R., Schreiber, S. L., Clemons, P. A., Carpenter, A. E., & Shamji, A. F. (2013). Multiplex Cytological Profiling Assay to Measure Diverse Cellular States. PLoS ONE, 8(12), e80999. 10.1371/journal.pone.0080999